Keeping your septic system in good condition ensures it will last longer. It also saves money and prevents expensive repairs or replacements.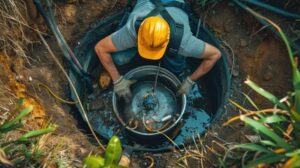
Wastewater from your home flows through underground pipes into a large tank buried in your yard. This tank separates solids from liquid waste, allowing bacteria to break down the remaining solids. Regular pumping and inspections keep odors from developing around your home. Contact The Septic Guys for professional help.
A residential septic system handles hundreds of gallons of waste daily, removing harmful bacteria, viruses and nutrients that would otherwise be released into the environment. The system consists of a septic tank and a soil absorption field, commonly called a drain field. If not properly maintained, the system can fail, leading to septic tank overflow, clogged drains and plumbing failures throughout the home.
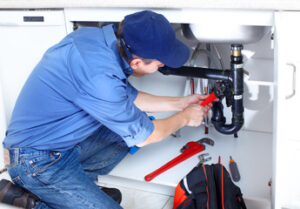
During a septic service visit, our professionals clean out the drains and perform a thorough inspection of the entire system. Then, we use specialized tools to break up and remove any clogs, so water and waste can flow freely again. These tools include hydraulic chopper pumps, high-pressure power jetting services, and a variety of “snakes,” which are cables that feed into the lines and clear blockages.
A septic tank should be pumped every 2-3 years to remove the sludge buildup that occurs naturally over time. Without pumping, the sludge can enter the drain field, where it can block up the pipe and cause wastewater to back up into the home.
Sewage backup in the house is a serious problem and should be addressed as soon as possible. The most common causes of sewage backup are a septic tank that is full or a septic drain line that is clogged. A quick call to a septic service company can prevent the condition from worsening and allow the homeowner to take steps to avoid costly repairs.
Proper septic system maintenance is critical to keeping your family healthy and safe. It is also a great way to keep your septic tank and drain field working effectively for many years. Slow draining, bad smells and other unwelcome symptoms are common indicators that the septic system is in need of service. By following some simple maintenance tips, homeowners can help their septic system remain in good working condition.
Avoid pouring cooking grease or oils down the drains as they will solidify and clog the system. Keep children and pets away from the drain fields, as they can dig into and damage the pipes. Do not park vehicles on or around the septic tank or drain field. Planting trees and shrubs too close to the septic system can also cause root growth into the lines. It is best to consult with a septic service professional if you are considering planting near your septic system.
Pumping
Septic tanks serve as the final destination for all of your wastewater, including toilet waste. It is important to keep your septic tank clean on a routine basis, as a dirty septic tank can lead to sewage backup in your home, which can result in expensive repairs.
The best way to keep your septic system working properly is to have it pumped regularly. A professional septic service can drain your septic tank to remove the solid waste and sludge that builds up over time. The septic service will also inspect the septic tank to ensure it is functioning correctly.
Most septic tanks will need to be pumped every 2 to 3 years. The exact time frame depends on several factors, like the size of your septic tank and how many people live in the household.
Regular septic tank pumping will prevent clogs, which can lead to wastewater backup in your home. In addition, it will allow your septic tank to decompose more efficiently and minimize the amount of wastewater that enters lakes, streams and groundwater.
If you haven’t had your septic tank pumped recently, it’s important to schedule an appointment soon. Neglecting septic tank pumping can cause a host of problems, including unpleasant odors, sewage backup and damage to your property.
A septic system is an important investment, and regular maintenance will protect your investment by reducing the risk of costly repair bills. Contact a reputable septic company to schedule your septic tank pumping services.
It is also essential to make sure that the septic service you hire is insured, as this will help to protect you from any liabilities if an accident occurs on your property during the pumping process.
If you have a septic system, you can minimize the need for pumping services by using your appliances wisely and by having a septic tank inspection conducted on a regular basis. If you have any questions about septic system maintenance, call the professionals at PreDoc today. They can help you keep your septic system running smoothly and worry-free.
Inspection
A septic tank is an underground holding tank where waste separates from wastewater in your home before it moves to the drain field. Over time, solid waste accumulates in the tank and inhibits the settlement and separation process, leading to clogs and other problems. Septic inspections are a great way to catch problems before they become serious and save you money in the long run. A septic inspector checks the entire system, including the septic tank and pipes, as well as the drain field to ensure they are in good condition. They will look for signs of damage or wear and tear, such as cracks in the tank and pipes and clogged drains and drain field. They will also examine the soil in and around your septic tank to see if it is contaminated.
A well-maintained septic system can last 20 to 30 years. However, a poorly-maintained septic system may need repairs sooner than you think. Fortunately, regular maintenance and septic tank pumping services can help extend the life of your septic system.
Sewage backup in your home is one of the most common symptoms that indicate septic tank problems. While septic system backups can sometimes be fixed by plunging toilets, it’s important to call a septic service right away to prevent further damage. Sewage back-up can damage your septic tank and other components of your home’s plumbing, as well as cause health risks for you and your family.
Another symptom of septic tank problems is water pooling or soggy areas in your yard. These issues are often caused by a septic tank leak, a faulty drain field, or overflowing pipes. These problems can lead to severe contamination and costly repair bills if left unattended.
If you’re planning on buying a property with a septic tank, it’s important to have the septic system inspected before making the purchase. A septic tank and grease trap real estate inspection will reveal the septic system’s condition so you can make an informed decision about your new home. Our technicians are qualified to conduct these inspections and provide you with a detailed report on the state of your septic tank and drain field.
Repair
Septic systems collect wastewater, breaking down the waste and distributing it to a drain field. The septic tank is located underground, usually several feet away from the home. The septic tank is designed with a sloping bottom to allow solids to fall to the bottom, where they are broken down by bacteria. The water on top is then distributed into the drain field, which is a large area of your yard. It is important to keep this system functioning properly to avoid costly repairs and environmental hazards.
You can help your septic system stay in good working order by being careful about what you put down the drains. Use low-flow fixtures, repair leaky faucets, and only flush toilet paper when necessary. It is also a good idea to limit water consumption to what the soil can absorb, and to plant trees and plants away from your septic tank.
If your septic system isn’t working properly, you might notice that the sinks are slow to drain or that there are foul odors in your home. These are warning signs that the septic system is overloaded, and they can quickly lead to sewage backups and expensive repair costs.
If you are experiencing any septic system problems, call Septic Service immediately. They can provide fast, affordable septic tank repair to keep your system in great working condition. Whether you need a simple fix, like replacing a Distribution box or a more involved repair job, they can get the job done. They specialize in residential septic repair, so you can trust that they will have the expertise and knowledge to tackle any septic system problem. They are fully licensed, insured, and certified, so you can rest assured that your septic system is in good hands with their experienced team.